Woodworker's Journal 2004 Summer, страница 47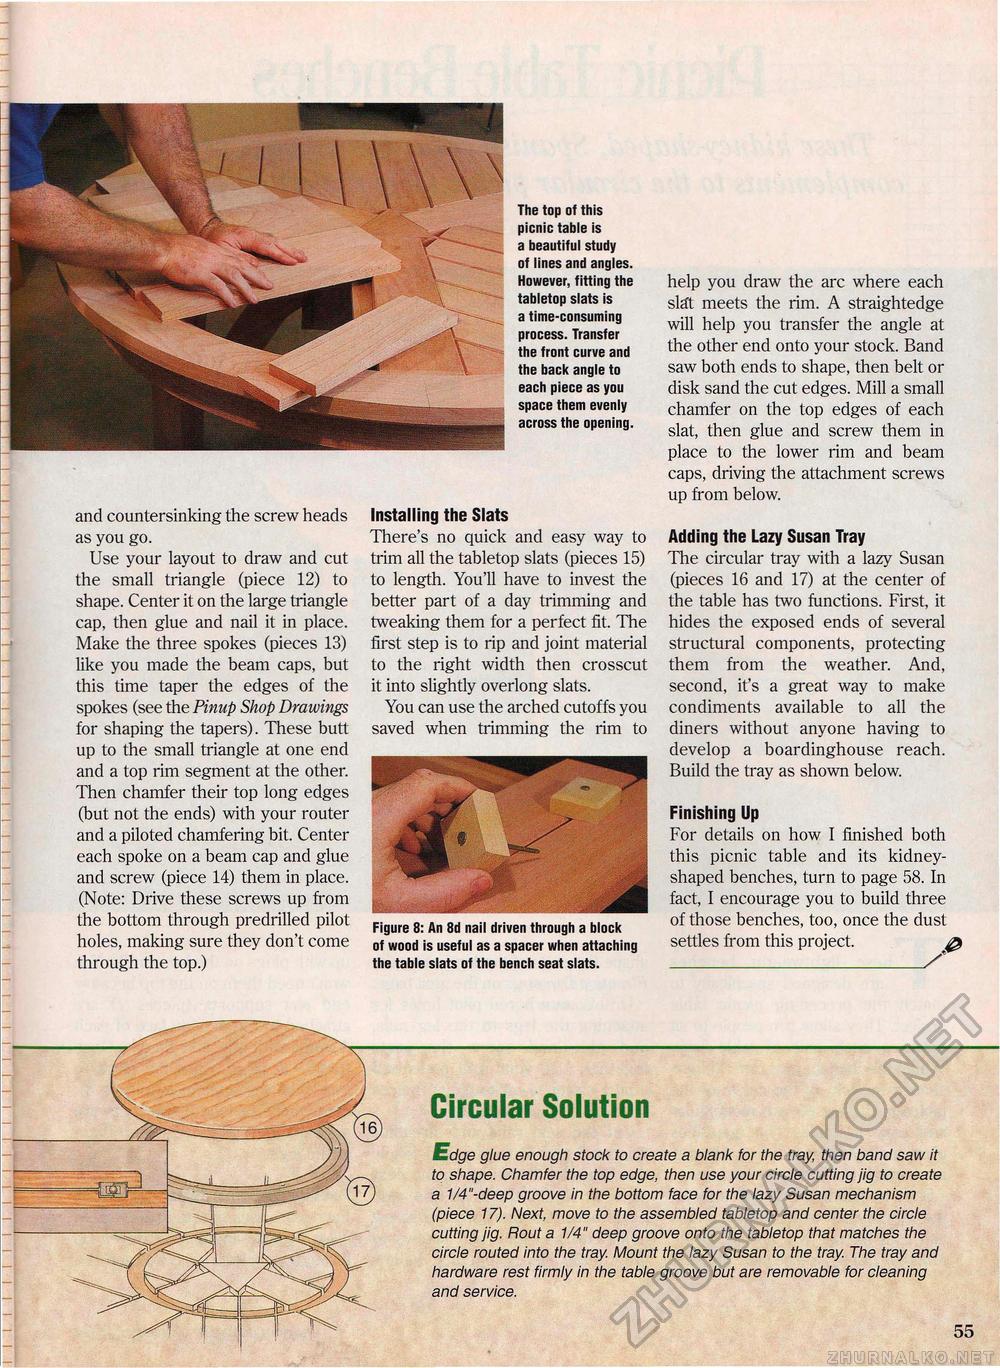
and countersinking the screw heads as you go. Use your layout to draw and cut the small triangle (piece 12) to shape. Center it on the large triangle cap, then glue and nail it in place. Make the three spokes (pieces 13) like you made the beam caps, but this time taper the edges of the spokes (see the Pinup Shop Drawings for shaping the tapers). These butt up to the small triangle at one end and a top rim segment at the other. Then chamfer their top long edges (but not the ends) with your router and a piloted chamfering bit. Center each spoke on a beam cap and glue and screw (piece 14) them in place. (Note: Drive these screws up from the bottom through predrilled pilot holes, making sure they don't come through the top.) The top of this picnic table is a beautiful study of lines and angles. However, fitting the tabletop slats is a time-consuming process. Transfer the front curve and the back angle to each piece as you space them evenly across the opening. Installing the Slats There's no quick and easy way to trim all the tabletop slats (pieces 15) to length. You'll have to invest the better part of a day trimming and tweaking them for a perfect fit. The first step is to rip and joint material to the right width then crosscut it into slightly overlong slats. You can use the arched cutoffs you saved when trimming the rim to Figure 8: An 8d nail driven through a block of wood is useful as a spacer when attaching the table slats of the bench seat slats. help you draw the arc where each sla't meets the rim. A straightedge will help you transfer the angle at the other end onto your stock. Band saw both ends to shape, then belt or disk sand the cut edges. Mill a small chamfer on the top edges of each slat, then glue and screw them in place to the lower rim and beam caps, driving the attachment screws up from below. Adding the Lazy Susan Tray The circular tray with a lazy Susan (pieces 16 and 17) at the center of the table has two functions. First, it hides the exposed ends of several structural components, protecting them from the weather. And, second, it's a great way to make condiments available to all the diners without anyone having to develop a boardinghouse reach. Build the tray as shown below. Finishing Up For details on how I finished both this picnic table and its kidney-shaped benches, turn to page 58. In fact, I encourage you to build three of those benches, too, once the dust settles from this project. @ Circular Solution Edge glue enough stock to create a blank for the tray, then band saw it to shape. Chamfer the top edge, then use your circle cutting jig to create a 1/4"-deep groove in the bottom face for the lazy Susan mechanism (piece 17). Next, move to the assembled tabletop and center the circle cutting jig. Rout a 1/4" deep groove onto the tabletop that matches the circle routed into the tray. Mount the lazy Susan to the tray. The tray and hardware rest firmly in the table groove but are removable for cleaning and service. 55 |


